Img2Img Guide for ComfyUI: Unleash Your Creative Potential
Are you interested in creating your own image-to-image workflow using ComfyUI? In this article, we’ll guide you through the process, step by step so that you can harness the power of ComfyUI for your projects. We’ll cover essential components like text-to-image workflows, and VAE encoding. Let’s dive in!
Introduction
Creating your image-to-image workflow on ComfyUI can open up a world of creative possibilities. Whether you’re a seasoned pro or new to the platform, this guide will walk you through the entire process.
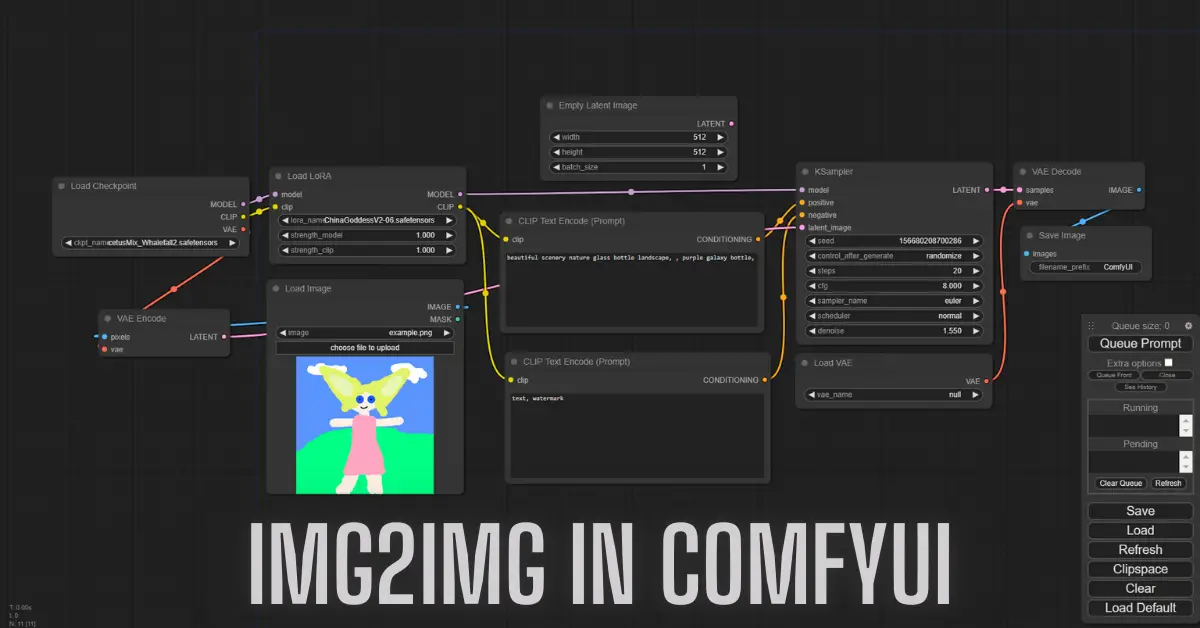
Img2Img ComfyUI Workflow
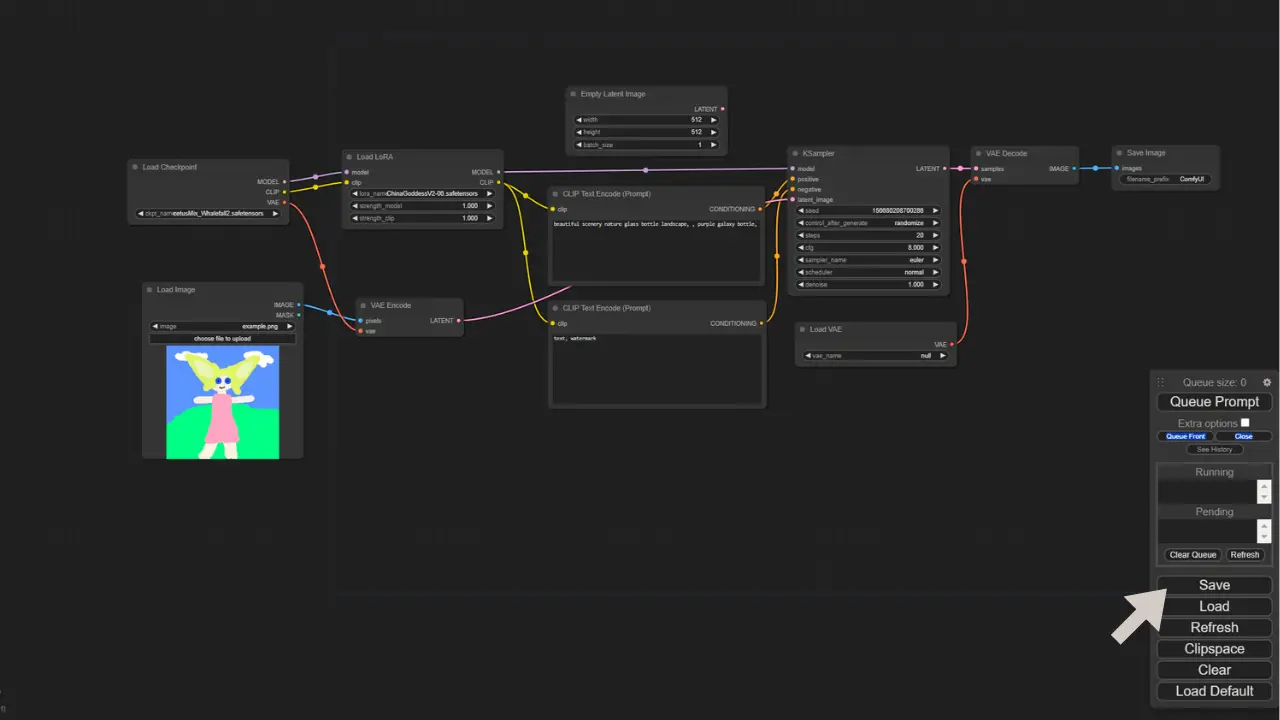
Here’s the step-by-step guide to Comfyui Img2Img:
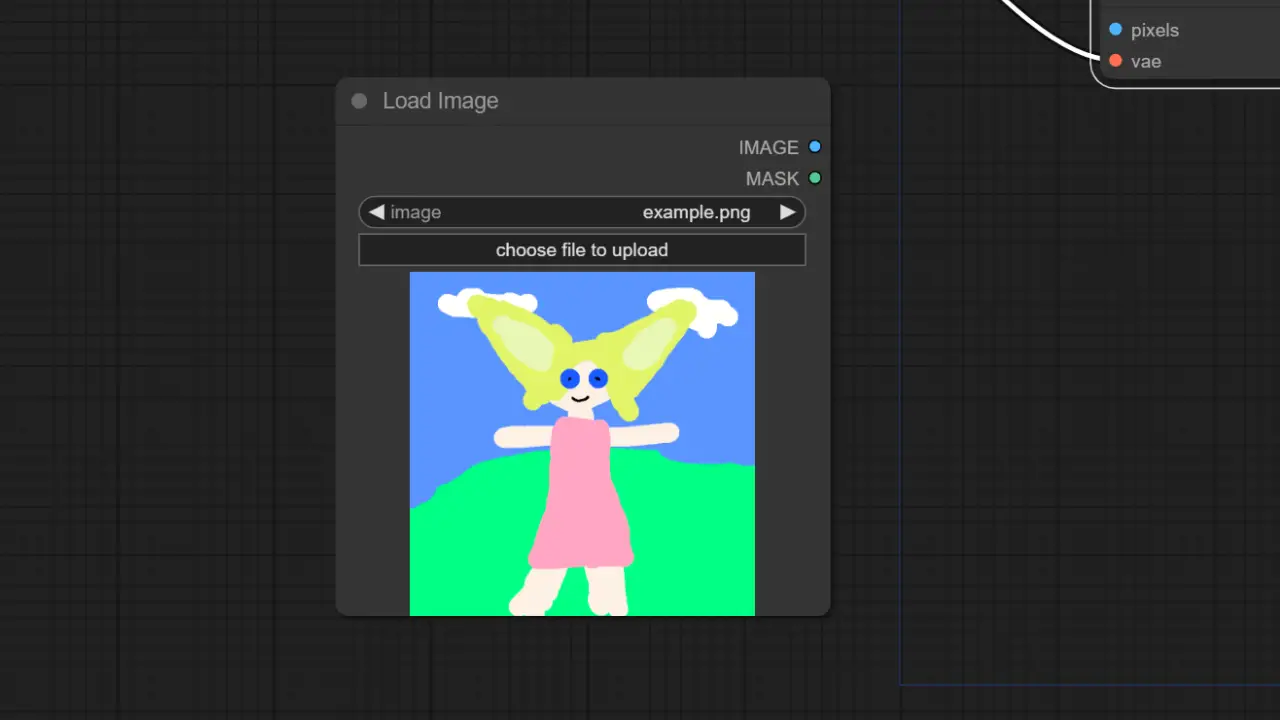
Image-to-Image Transformation
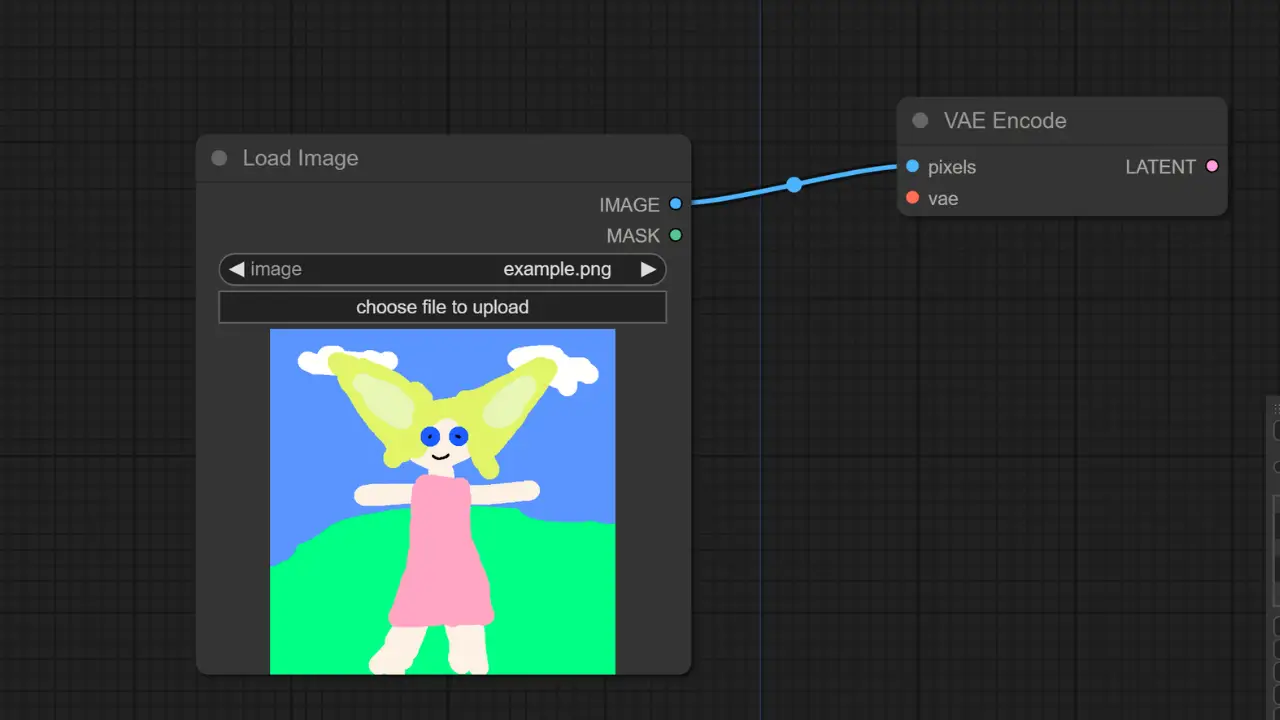
To transition into the image-to-image section, follow these steps:
- Add an “ADD” node in the Image section.
- Locate and select “Load Image” to input your base image.

VAE Encoding
The next step involves encoding your image. Follow these instructions:
- Add a node and select “VAE Encode” from the latent section.
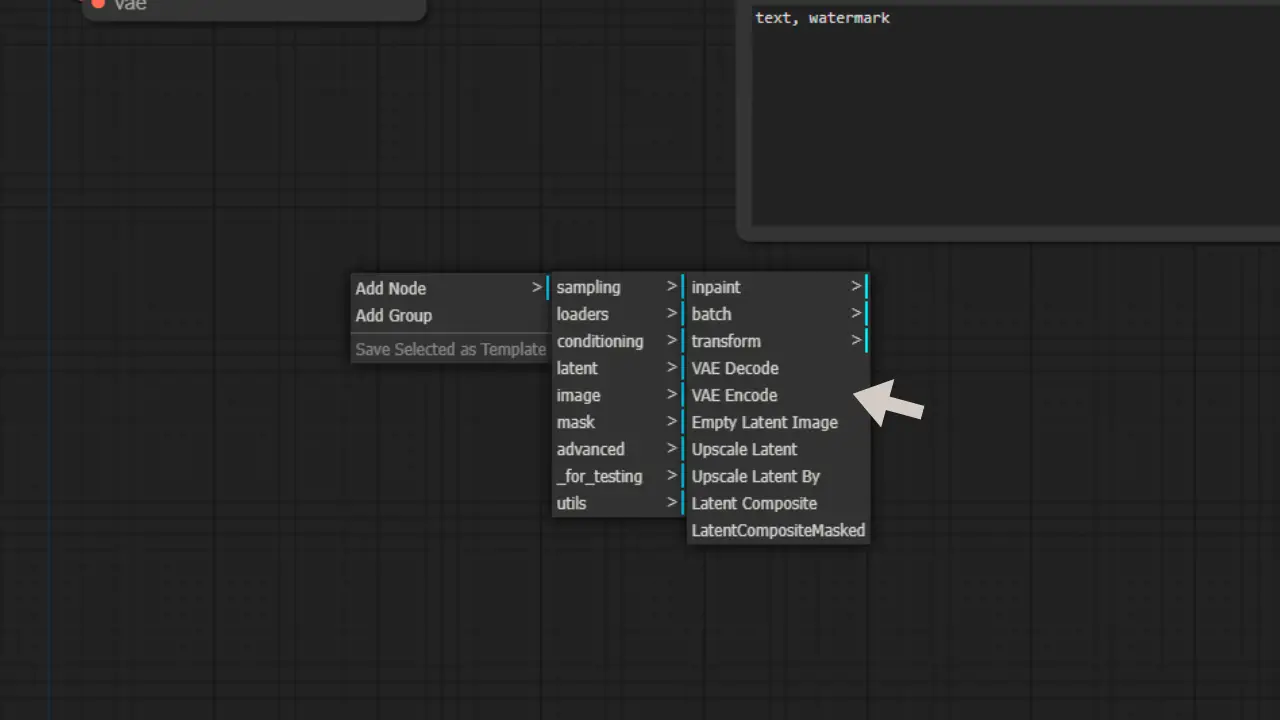
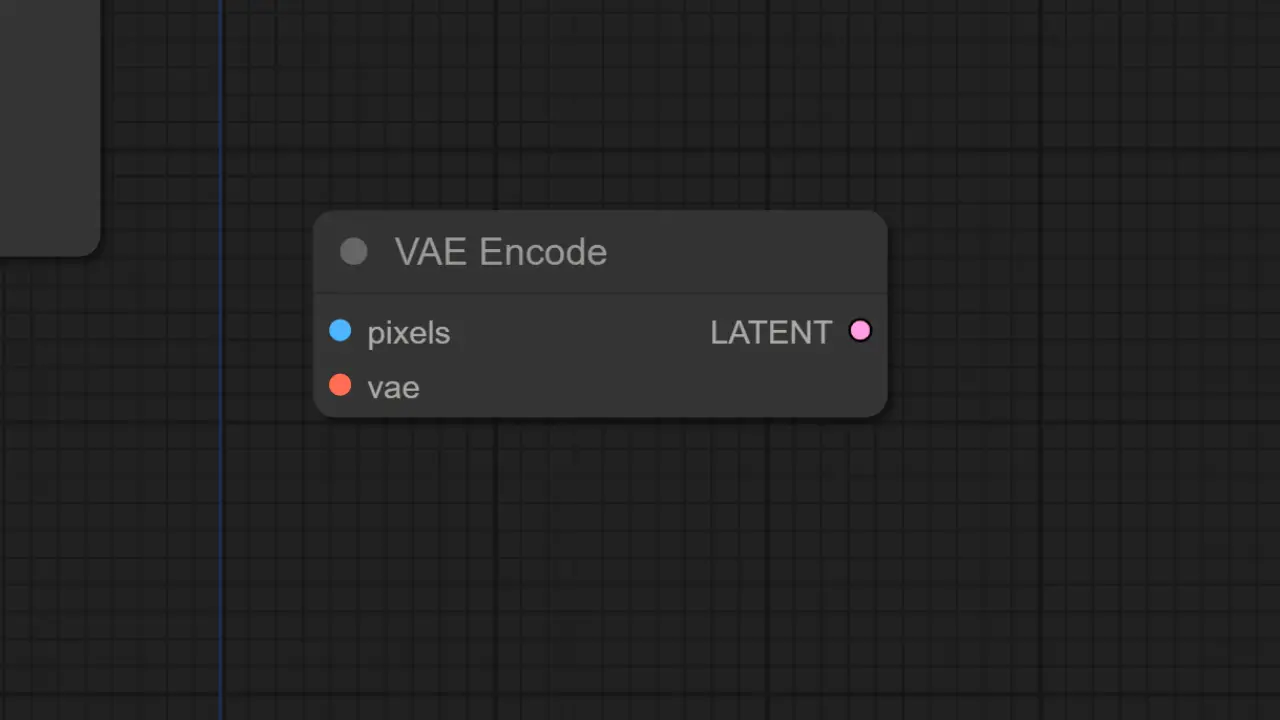
- Now, the Image-to-Image section is set up.
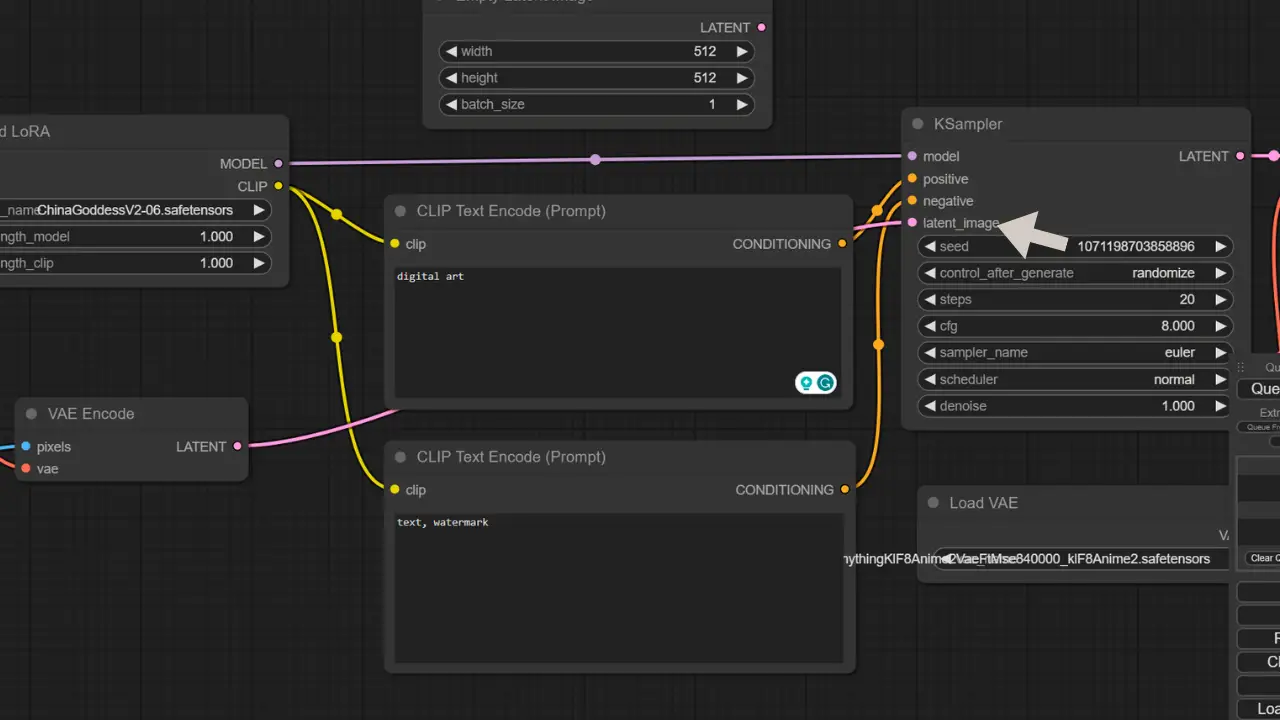
Connecting the Dots
To ensure a smooth workflow, connect the following components:
- Link the image to the “Pixels” input.
- Connect the VAE Encode “vae” to the Load Checkpoint “vae“.
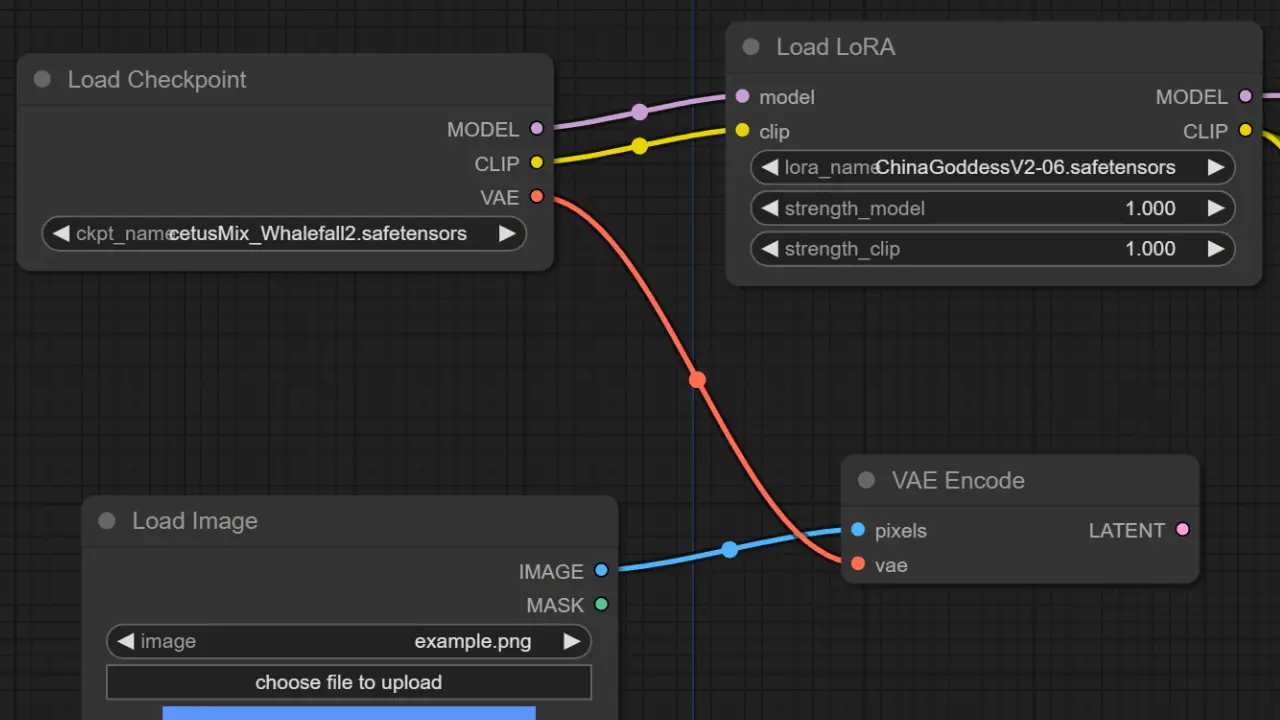
- Connect the VAE Encode “latent” to the KSampler “latent_image“.
At this point, your image-to-image transformation setup is complete.
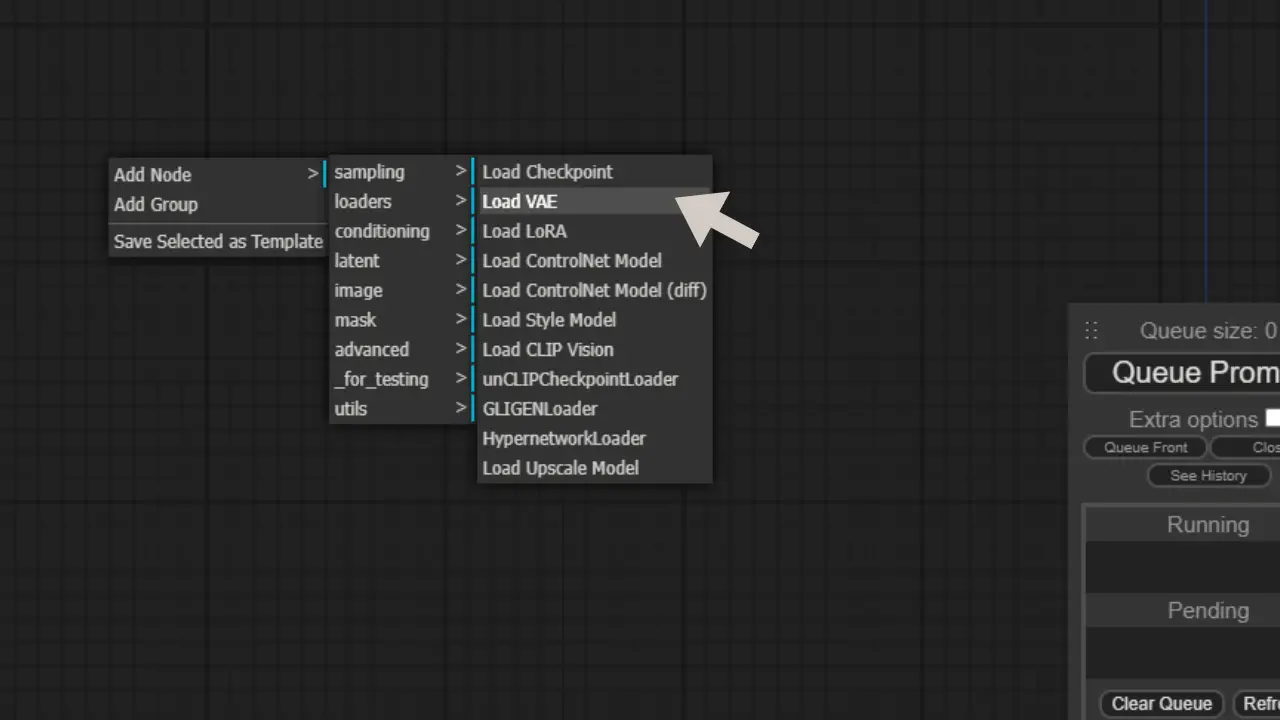
Load VAE
Now the final step:
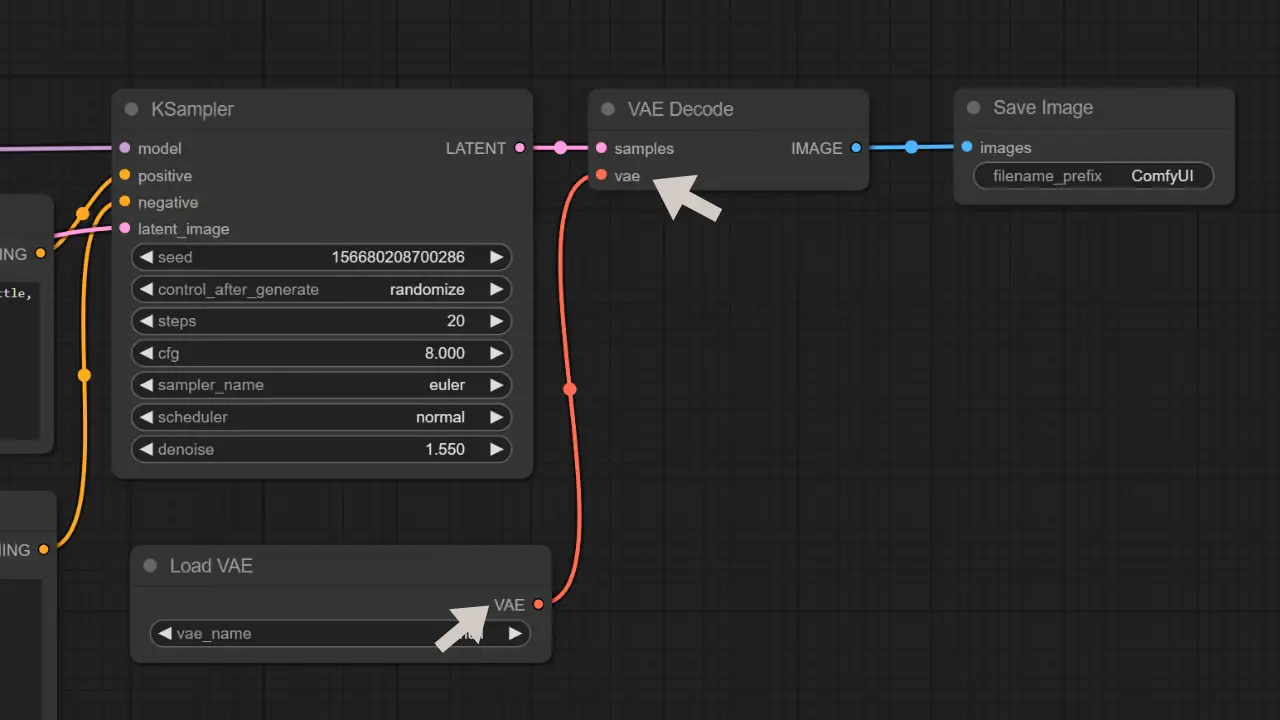
- Add a node and select “Load VAE” from the loaders section.
- Connect the “vae” to the “vae” of the VAE Decode.
To access the complete workflow, please click on download.
Now you can start your journey to im2img in ComfyUI. Everything is ready.
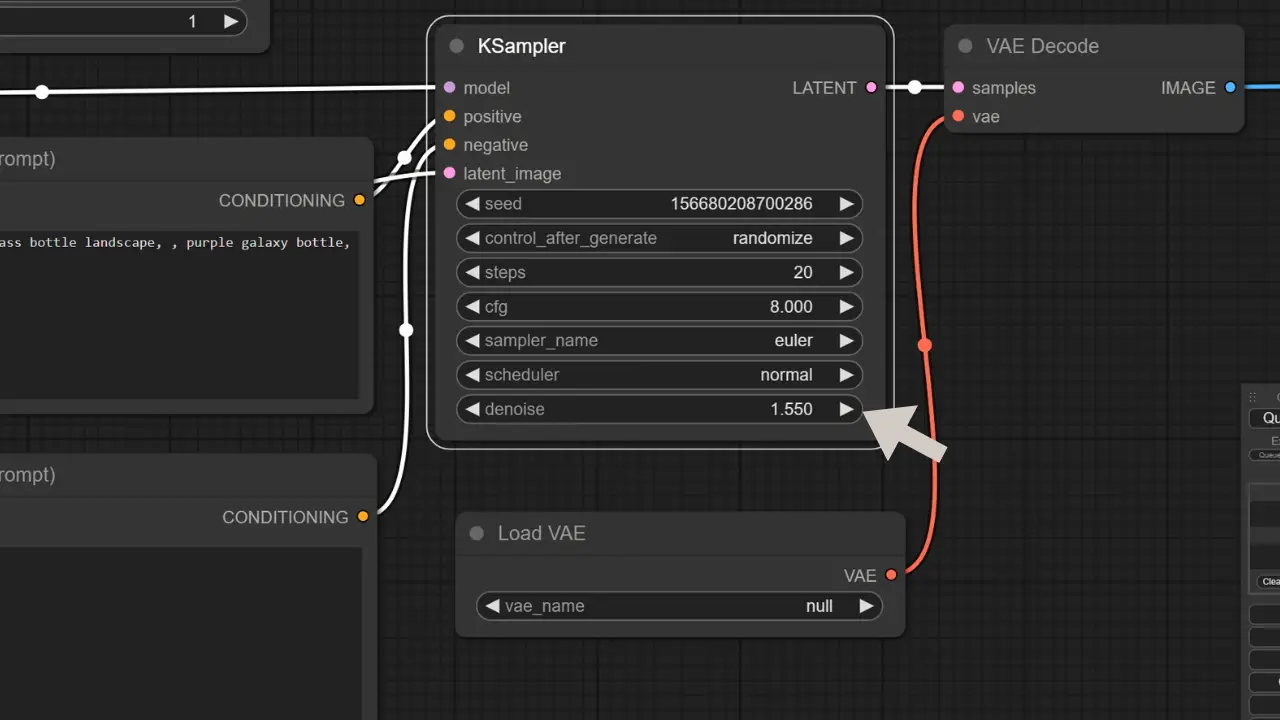
Optimizing Your Workflow
To enhance the final image quality, consider tweaking parameters like denoising strength. Experiment with different values to find the right balance.
Saving Your Workflow
Once you’ve fine-tuned your setup, you can save it for future use. This way, you won’t have to rebuild the workflow every time you want to generate images.
Conclusion
Congratulations! You’ve successfully built your image-to-image workflow on ComfyUI. We hope this guide has been helpful in your creative endeavors. Feel free to experiment and customize your workflow to achieve the best results for your projects. Whether you’re creating art or enhancing photos, ComfyUI offers a versatile platform for your image-to-image needs.